
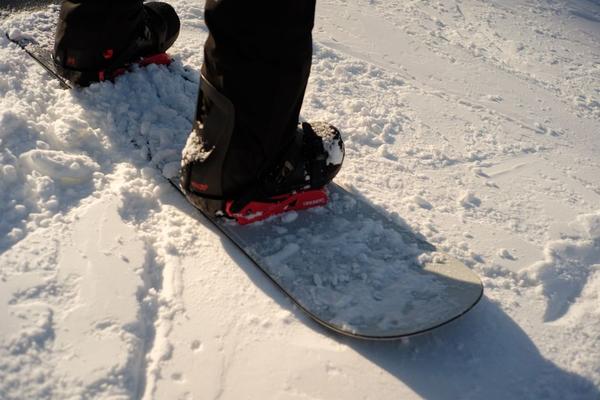
A snowboard can feel completely different after a small binding adjustment. If your knees feel twisted, turns seem awkward, or riding switch feels impossible, the problem might not be your technique alone. Snowboard binding angles determine the direction your feet point across the board, while stance width affects how comfortably you can balance and move. For most beginners, a modest duck stance is a sensible place to start, but it is not the only workable setup.
What snowboard binding angles actually mean
Each binding rotates around a mounting disc or adjustment mechanism marked in degrees. Zero degrees places the foot roughly perpendicular to the board’s length. A positive angle points the toes toward the nose; a negative angle points them toward the tail. Snowboard stance angles are usually written front foot first, so +15°/-6° means the leading foot points 15 degrees forward and the rear foot points six degrees backward.
Your leading foot depends on your stance: regular riders put the left foot forward, while goofy riders lead with the right. The angle notation describes front and rear positions, not left and right feet. This distinction prevents a surprisingly common beginner setup mistake.
Beginner binding setups worth trying
+15°/-6°: A versatile first setup
For an unfamiliar board, +15° on the front foot and -6° on the back is an excellent baseline. The slightly open position encourages a relaxed knee bend and works for ordinary resort turns as well as early attempts at riding switch. It is commonly recommended in snowboard mounting guides, but treat it as a starting measurement rather than a rule.
+15°/0°: A more directional option
Keeping the front foot at +15° and setting the rear foot at zero gives the back leg a more neutral, sideways orientation. Some beginners find this intuitive when they spend nearly all their time travelling in their preferred direction. It can also suit relaxed all-mountain riding. Compare it with a mild duck stance on similar terrain rather than assuming one will automatically make you turn better.
+12°/-12° or +15°/-15°: Freestyle-oriented duck stance
A duck stance snowboard setup points both feet outward. More symmetrical combinations, such as +12°/-12°, can feel balanced when riding switch because the feet are oriented similarly in either travel direction. This makes them popular starting experiments for freestyle riders, though more angle is not necessarily more comfortable. A wide stance combined with an aggressive duck angle can feel demanding on some knees and hips.
Why stance width matters as much as the angles
Changing the angles while ignoring snowboard stance width is like adjusting a bicycle seat without checking its height. A stance that is too wide may make it hard to rise smoothly out of a turn; one that is too narrow may feel unstable when absorbing bumps. The snowboard manufacturer’s reference stance, often marked beside the inserts, is a practical starting point. A width close to your natural shoulder-width position also offers a useful comfort check.
Measure between the centres of the bindings, not the outer edges. With your boots on, stand in the mounted bindings on a flat, stable surface and bend into an athletic position. Your knees should move comfortably in the direction of your toes without forcing your hips to twist. Small changes to width can alter how a given pair of angles feels.
If board sizing is still uncertain, understanding how to size a snowboard is worth exploring before making unusually large stance adjustments to compensate for an unsuitable board.
Setting the bindings without guessing
First identify the board’s nose and your preferred leading foot. Check that the mounting discs or system match your snowboard and that you have the correct manufacturer-supplied hardware. Select the reference stance or another suitable insert position, then rotate each binding to the desired degree marking. Some discs use three-degree increments; other systems differ, so check the scale carefully.
Before final tightening, step into your boots and check that the toe and heel overhang are reasonably balanced. Make sure straps sit correctly over the boots and that neither binding collides with an edge. Tighten all fasteners according to the manufacturer’s instructions with an appropriate hand tool, not a power drill. Recheck them after your first run and whenever you adjust the setup.
Boot fit can create problems that look like angle problems. If your heels lift inside the boots or your straps are poorly positioned, changing the discs will not solve the underlying issue. A guide to choosing snowboard bindings can help separate fit questions from stance questions.
A simple on-snow test that produces useful answers
Imagine a new rider whose board starts at +15°/-6°. On the first two easy runs, they notice stable heel-side stops but awkward toe-side turns. Instead of rotating both bindings immediately, they check whether their knees track naturally, whether their boots are centred, and whether their stance feels too wide. Only after those checks do they try one small adjustment, such as moving the rear foot from -6° to -3°.
Use the same gentle slope for comparison. Make a few heel-side and toe-side turns, traverse comfortably, and try a short switch glide only if it is within your skill level. Record the angles and width on your phone. If you change several settings at once, you will not know which one made the difference.
Common setup mistakes to avoid
One mistake is copying an advanced carver’s strongly positive angles simply because the rider looks powerful. Those settings support particular movements and may be poorly suited to someone still learning basic turns. Another is assuming that a symmetrical duck stance is mandatory for freestyle. Personal anatomy, stance width, board shape, and what feels controlled all matter.
Frequently asked questions
What are the best snowboard binding angles for beginners?
+15°/-6° is a widely used beginner starting point. +15°/0° may also feel comfortable, especially for directional riding. Neither is universally best; your knees, board, and ability to steer comfortably should guide the final choice.
Is duck stance better for learning snowboard tricks?
A duck stance can make riding switch feel more natural, which is useful for freestyle progression. You do not need an extreme negative rear angle to begin learning. Practise fundamental control and switch riding before fine-tuning for tricks.
How often should I change my snowboard stance angles?
Only when you have a clear reason, such as discomfort or a change in riding goals. Test one adjustment at a time over comparable easy runs, and always confirm that your mounting hardware is secure before riding.
Can the wrong binding angles cause knee pain?
An uncomfortable combination of angles and width can contribute to an awkward stance, but pain has several possible causes, including boot fit, technique, and injury. Stop riding if pain develops; do not assume a binding adjustment is a medical fix.
Find a setup you can forget about
Good snowboard binding angles rarely attract attention once you are moving. Start around +15°/-6°, use the board’s reference width, and check that your knees and boots feel natural. Then spend more time practising than adjusting hardware. Your stance can evolve with all-mountain riding, freestyle goals, and experience, but comfort and predictable control should lead every change.